Are you tired of seeing the same old furniture around your home daily? If so, do something to make an aesthetic change to your home. Give your home a chunky look by adding some style to it. In this case, your budget might be a problem.
But you shouldn’t be sad, because making your furniture is also a good way to make your home look nice. Even though there are many choices, for now, we’ll talk about the making process of a DIY pouf ottoman, which is an old piece of furniture from the Ottoman era.
If you have limited space for your living area and want to increase the number of places where people can sit, then adding a beautiful pouf ottoman could be a good idea. Let’s look at details about the pouf ottoman and the DIY process of making it.
What is a Pouf Ottoman?
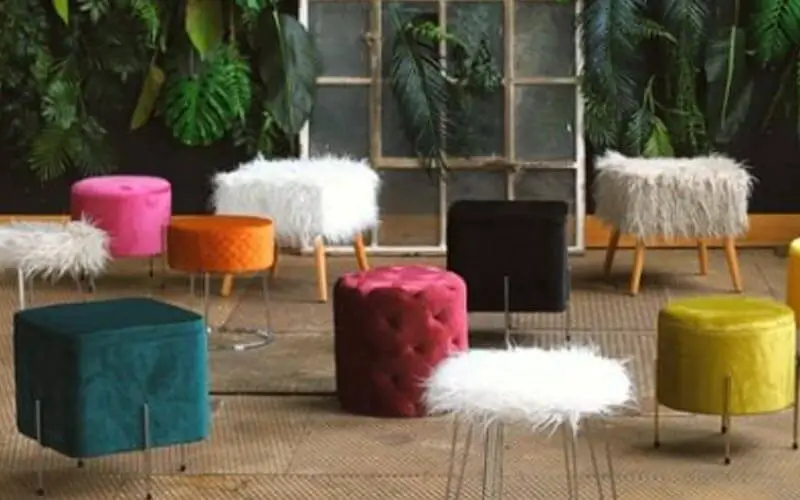
In a basic introduction, a pouf ottoman is a modern version of ancient furniture that looks like a large pillow with more thickness and weight than a normal pouf. Most pouf ottomans have legs that allow them to function as chairs and tables.

The pouf ottoman comes in a variety of shapes and sizes. Moreover, the pouf ottoman has hidden storage to keep things like books, magazines, or other tiny things.
Why DIY Pouf Ottoman is Ideal Than a Ready-made One?
The pouf ottoman is available in both ready-made and DIY. However, it is not beneficial to purchase a ready-made pouf ottoman because it will turn flat after a few months.
The majority of ready-made pouf ottomans have poor stuffing, which is the primary reason they have lost their original look. After that, you won’t be able to use them as chairs or tables because they will lose their initial shape. Unfortunately, by the end of the day, it will serve no purpose other than as a bean bag for your child.
Moreover, ready-made pouf Ottomans are expensive, so of course, you will not want to buy something that is not worth buying. In such a solution, making a pouf ottoman on your own is a good idea.
It will allow you to do a proper stuffing job, and you will be able to change the stuffing according to the shape of the pouf ottoman.
To start this process, knowing about the making process is essential. Let’s have a look.
How to Make a Pouf Ottoman: The Details
A pouf ottoman’s appearance and design are unique compared to other types of seating furniture. The pouf ottoman is a versatile piece of furniture. Your living area will look more elegant when you add a pouf ottoman, and it’s not difficult to make your pouf ottoman at home.
You may make it by using a fabric of any color, but choosing a bright color will be best. To make a DIY pouf ottoman, the first thing you need to do is collect the necessary tools and materials, and then you need to follow a set of simple steps in the proper sequence. So let’s start.
Step 1 – Gather Tools and Materials
To begin making a pouf ottoman, gather all the necessary tools and materials, including a sample pattern, cutting tape, fabric, pins, sewing machine, thread, stuffing, needle, and embroidery.
Step 2 – Choose the Preferable Design and Pattern
The internet is a great resource for finding the perfect pouf ottoman pattern. Take a sheet of paper, and use the pattern as a guide. Next, cut out the paper in the required shapes. The shape could be anything, such as round, square, rectangle, octagon, etc. After making the expected shape make an end cap by sewing them together and taping them to make the pattern stable.
Step 3 – Cut the Fabric into The Shape You Want
Set the pattern onto the fabric by setting it on the floor or any flat surface. Make eight complete sets according to the sample pattern. Cut the fabric into an octagon shape one by one. The fabric should be folded in half, the long edge of the fabric should be pinned, and the excess fabric needs to be cut with a scissor.
Step 4 – Let’s Get into The Sewing Steps
First of all, sew all the sides of the fabric together and sew them, press them with an iron to look flat. Then join all the panels of the pouf by maintaining 5-inch gaps. Use a pin to track the distance, sew the panels one by one and remove those pins. Then stitch all around the pouf and leave a 10-inch gap at the top of the pouf for staffing.
It is important to remember that all stitches should be zigzag because poufs are designed to bear a lot of weight and have rough use. In addition, a zigzag stitch can keep all the parts of the pouf attached where a straight sewing technique might fail.
Step 5 – The Stuffing Method
The stuffing process will depend on whether your pouf ottoman will have a leg. If it is a leg-free pouf ottoman, stuff it with fabrics or clothes. But the fabrics should be the heaviest so that the pouf looks fluffy and thick.
Do not use wool or cotton because while you will change the filling, it will create a mess.
Step 6 – Additional Tasks
Following the step of stuffing the pouf, the pouf opening should be covered with fabric so that the stuffing does not leak out. After the stuffing process, fold the corners of pouf around 1/2″ and sew them with a hidden stitch around the opening.
When you’re finished sewing, flip it upside down, and your pouf is ready. And in a general sense, the pouf is finished, but if you like, you may stitch decorative threads into the pouf or do some embroidery to make it look more polished and attractive.
Step 7 – Your Pouf Ottoman is Ready Now
Now your pouf is ready to sit. Place them in the preferred place in your room.
Final Word
Making a pouf ottoman at home is nothing difficult. However, you need some practice to make a professional one. Try to make different shapes of pouf ottomans to become a professional DIYer.
Want to Learn More:
Ellen Franz is an award-winning home designer whose work has been featured in numerous publications. In addition, he has collaborated with some of the industry’s most influential members. Ellen’s experience as a designer and his ability to understand the needs of her clients makes him a perfect fit for The Home Expert. Ellen is also well-known for his expertise in furnishing and remodeling.
