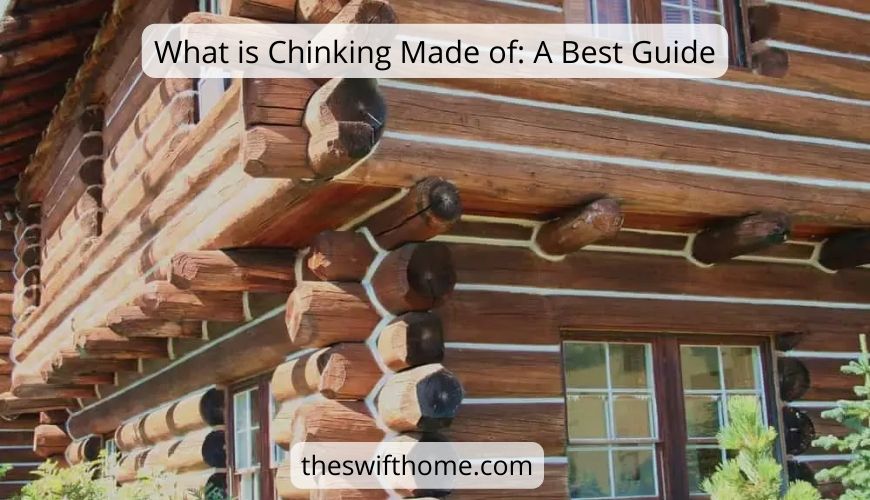
If you are thinking of the construction, purchase or maintenance of the log cabin there is no way to get far without talking about chinking in log cabins.
Chinking is the substance that is inserted between the cracks and joint of logs to provide the logs have a “seal” from external elements (e.g. snow, rain and snow) while preventing losses in heat as well as air permeation.
Simply put, chinking is the kind of flexible sealant you use for the building of your log house or maintenance. It seals joints between the logs and gaps, and holes, as well as checking.
Today, Log Home Chinking has replaced traditional daubing with Portland cement chinking, which traditionally was utilized in log homes more than 200 years old.
Since the very beginning in traditional log cabin chinking has been the hallmark of these gorgeous residences.
But, chinking in the same log jam and cabin today may be an extremely complicated subject:
- Do you need to use cement chinking and synthetic lime based chinking?
- How much will the chinking of a traditional log cabin cost?
- How do you create your Chinking (what’s the top recipe for chinking)?
- What are the best techniques and ways to use chinking for the home of a log?
- What exactly is caulking? How does it differ from Chinking?
Continue reading and we break down log cabin chinking and address all your concerns…
Why Do We Need Chinking?
The chinking needs to be done for our log cabin:
- Incorporate an “seal” from external elements (e.g. snow, rain, and sleet) and protect the logs from standing water or pooling that could lead to rotten logs.
- Reduced the loss of heat and the infiltration of air to improve the energy efficiency of your cabin through proper insulation of the room.
- Protect yourself from insect and bug invasion by repairing tiny holes inside the wall of your log cabin.
Logs don’t always work.
Logs may twist, kink or bow, as well as cup.
The environment’s changes such as humidity, temperature, sun shading exposure, as well as differences in geography may cause logs’ movements because their moisture content fluctuates.
Logs are also characterized by their uneven character and a sloppy structure.
It’s therefore nearly impossible to construct an log cabin using the logs which are perfectly joined and have no gaps.
An example of this type of construction is also a dangerous choice.
When your home’s logs settle and your logs grow and expand and contract (due to the above factors) If there weren’t an open space for logs to pass through, it could cause more bowing and twisting of the logs.
What is Chinking?
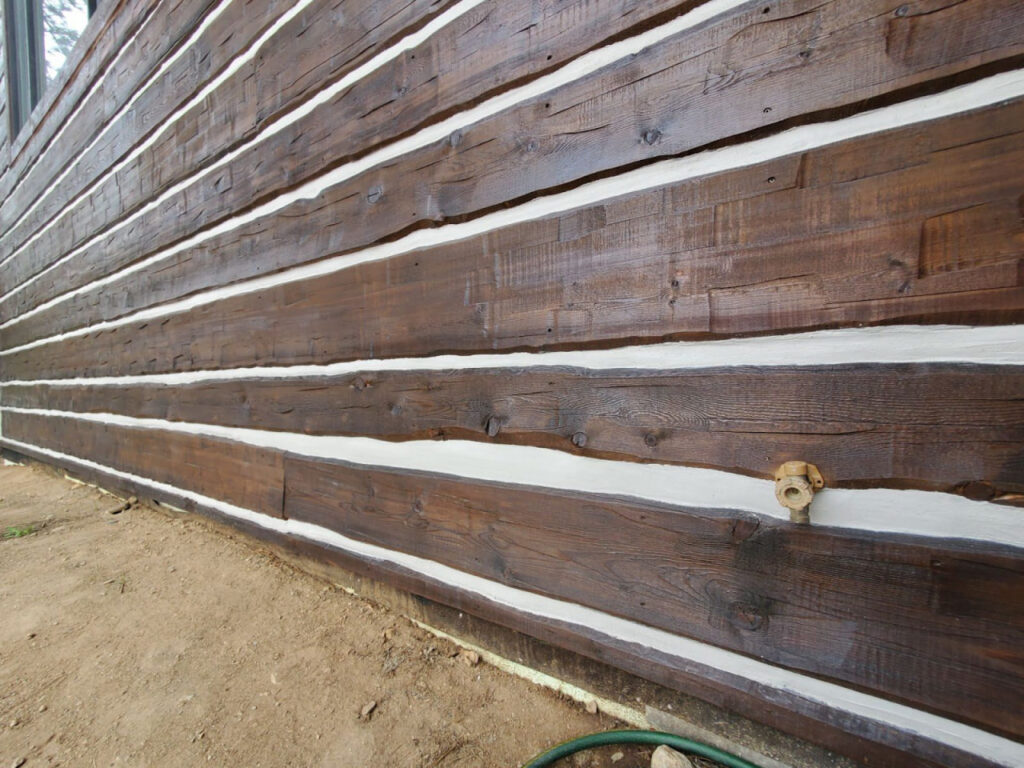
In simple terms, chinking refers to the kind of material that’s placed between the log home that make up homes made of logs.
Chinking log home is as mortar does to bricks.
Chinking is a stretchy material utilized to close gaps in which logs aren’t able to meet fully. Chinking a tree home can ensure that log home that do not fit perfectly together will have a good seal.
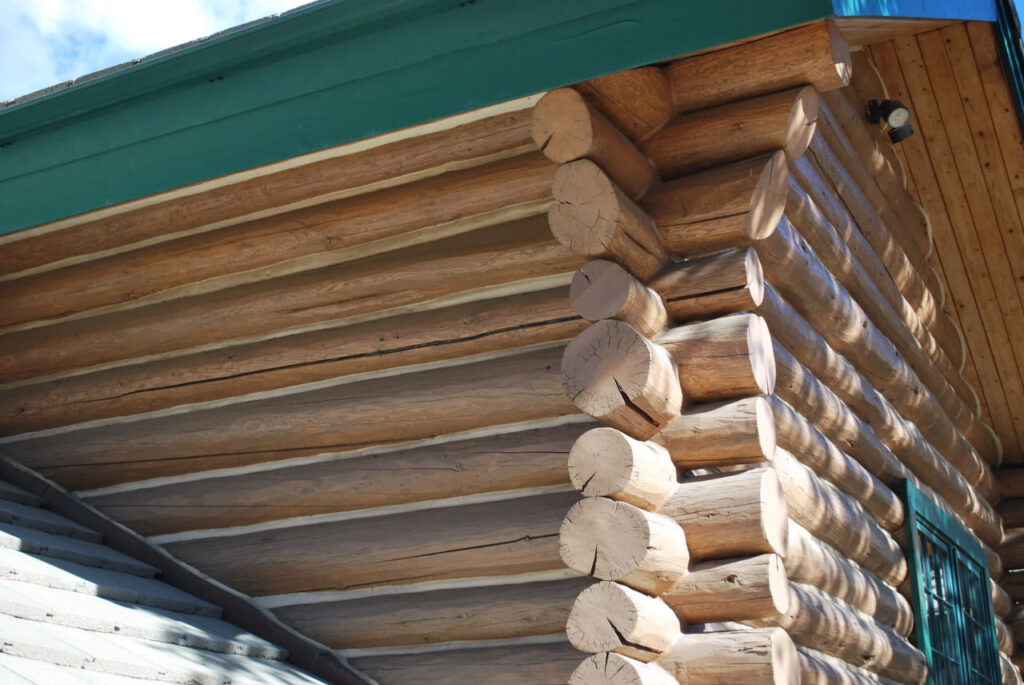
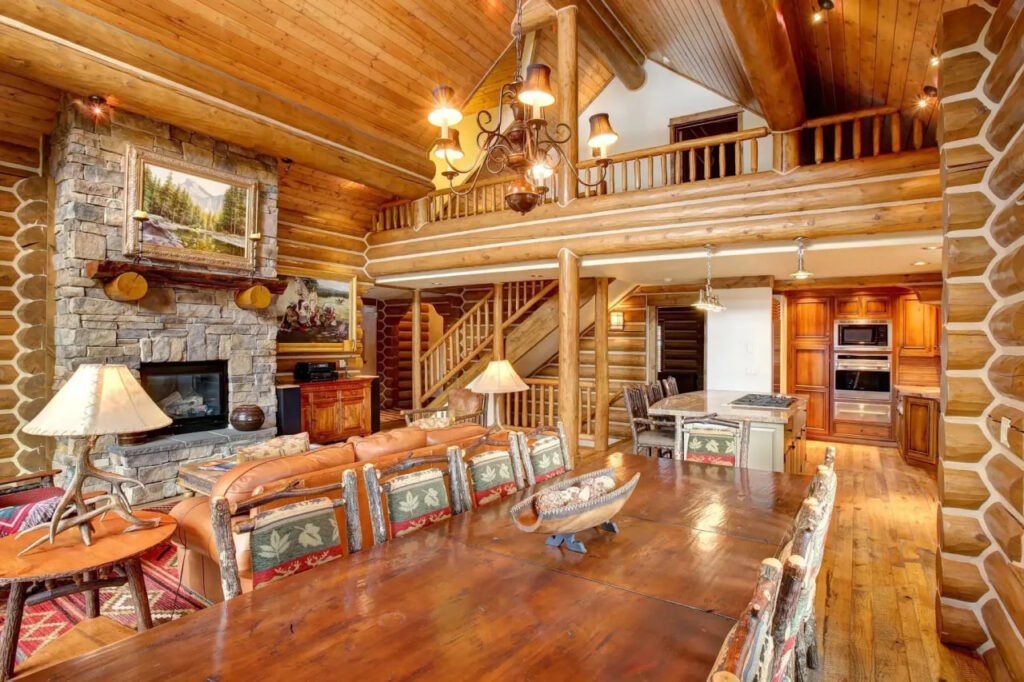
The “nice seal” is the most maintenance-free form of interior protection against moisture, air infiltration. It also provides insulation as well as protection against fire in your home made of logs.
Log cabin do not need cement chinking. Why cement chinking anyway?
It is dependent on the notch employed.
If the cabin is equipped with an air-tight cut (e.g Scandinavian Chinkless) it will not require the chinking.
Any other cabin notches are acceptable (e.g. corner, dovetail and butt and even pass).
What Material is Chinking Made From?
Today, the term log home chinking can be described as an elastic and flexible sealant that is similar to the look of older portland cement chinking that was employed to bind logs.
Before the advent of cement chinking techniques, the traditional chinking consisted of clay, sand silt and dirt.
The inner layer” that was in the middle was called “daubing” and the out-layer most commonly referred to by the name of “chinking”.
Chinking should enable the logs of your cabin to breathe while also shielding your house from many factors and outside elements mentioned earlier.
Types of Log Home Chinking
There are two major theories on the use of chinking substances:
- Mortar Chinking
- Synthetic Chinking
Mortar chinking follows the old method of chinking log homes, and is mostly utilized for log cabins that are built by hand (i.e. log cabins constructed completely from scratch).
Synthetic chinking is constructed from either petrochemical or acrylic chemicals that can expand and contract by the logs.
Synthetic chinking is typically water-based. However, there are a few that are oil-based.
What is the most significant difference?
Price
Most mortar chinkings are about 10% of cost for synthetic chinking. This will be discussed more in the section on price in the future.
Based on our experience the log cabin kits utilize synthesized chinking, as well as self-build cabin owners employ traditional mortar used for chinking.
Whatever the chinking material you choose you choose, it should have elastic properties.
Knowing that your cabin is likely to change and then planning using chinking that is flexible is crucial.
Chinking should expand and contract while keeping a seal tight as well as allowing your logs breathe (i.e. that they are not entrapping water).
So, Mortar Chinking or Synthetic Chinking?
It depends.
If you’re using log building, with the log cabin kits it is likely that you will be using synthetic chinking because logs must adapt to the surroundings and climate.
If you’re creating a cabin from scratch the chances are you’ll be using the mortar you have made yourself; as long as the logs are removed locally and been properly dried.
There is no strict standard.
If you are building your cabin from logs, it is possible to pick from any of the two materials.
But, based on the experience of self-builders, they will employ mortar to create the most authentic appearance and also save money.
What’s the Difference Between Caulking and Chinking?
Perhaps you’ve heard the terms caulking and chinking as being interchangeable, but there’s a distinct difference.
The major difference between chinking and caulking is due from their intended purpose.
They are similar in their material.
But, it is only employed for smaller logs (e.g. 6″ or smaller in diameter) or to either fill gaps or in gap between logs.
Usually, if the span or distance between the logs is not more than one inch, caulking is applied.
Caulking is also employed to fill check holes (i.e. horizontal cracks) inside logs, too.
If the width or depth between the two logs is more than 1 inch, it’s the time to consider the chinking.
Chinking is also used on bigger diameter logs, too (e.g. 6″ or larger in diameter) and works with most methods of notching (e.g. dovetail and traditional).
Chinking may cover a range of 1-5 inches wide.
It is typically a more smooth surface, while chinking can be an extremely coarse-textured surface.
How much does Log Cabin Chinking Cost?
The cost of chinking may be influenced by a variety of factors.
- Dimension of Chink Lines (1 inch to 5 inches)
- Square Footage of Cabin
- Gable wall height up to the Ridge
The cost of chinking log cabins is based on a per-foot basis as well as per pail (i.e. bucket).
The majority of pails are five-gallon sizes.
When the line of synthetic or chinked together extends 1 inch in width and a 1-inch depth, it is recommended to pay $1.20 for each foot of synthetic chinking, and $0.15 for mortar for chinking
For Example
A Cabin that is 20 feet (width) in 24FT (length) + 9FT (height). By using 12″ diameter logs, you’ll have roughly 9 logs up high.
The length of 88 linear feet (perimeter that surrounds your cabin) 8.1 inches Chinking lines (number of logs that are high by 1) is 704 linear foot.
The number will be multiplied two times when you chew between the inside and outside.
It is 1,408 linear feet the chinking.
If you had to chink your cabin with synthetic chinking, the expense for chinking would be $1,689.60.
If you wanted to have chinked the cabin by using mortar, the expense for chinking is $211.20.
The prices listed above exclude the cost of labor as well as backing rods.
Backroads are generally $0.25/foot and labor is approximately priced at $8/foot.
Once you know what log home chinking means and the types of materials it can be constructed from; we’re now discussing ways and methods to apply the chinking technique to your log cabin.
How to Chink Your Log Cabin
A log cabin is chit-chatting.
It is an extremely simple task.
This could also be.
It can take a lot of effort, is awkward and lengthy and takes a lot of patience!
Chinking your home’s logs is completely possible. You only need to adhere to the fundamental rules and procedures.
A quick tip
If you’re thinking to make your own chinking recipe, go to the chinking recipe section.
If you’re buying chinking products, then the best option is to make use of a combination of the products. Buy your chinking as well as stain from the same company because their formulas have been vetted to ensure they are compatible.
The time is now to go for a sip.
Applying Chinking
If you want to avoid the chin, becoming familiar with the tools is crucial.
When you’re comfortable the tools you use, speed and quality will follow along.
Chinking is applied in the following four phases:
- Log Preparation
- Backer Rods Installation
- Application of Chinking
- Clean-up!
Top-tip
Prior to chinking your cabin, you’ll be required to select the stain you’re applying (if you have any).
A fundamental principle:
- If you’re applying an oil-based stain, begin by chitk and then apply the stain until finish.
- If you’re using a water-based stain, the stain should be applied first, then perma chink till finish.
The first step in the chinking process is to create the logs.
Your logs should be free of surface dirt. This is a requirement for dust, pollen, mildew as well as wax, oil and sawdust. Check out this article for additional information regarding how to clean logs.
When they are clean After cleaning, logs should range at a temperature of 40degF (4degC) between 80degF and 40degF (26degC).
The logs’ surfaces aren’t too hot for the water to evaporate in the chinking. Alternatively, it is too cold. If the logs are cold, the pores will tighten to keep the chinking free from sticking.
The next step to Chinking is applying the backer rod.
A backer-rod, or a homemade alternative, is an “bond breaker” which provides an area that chinking can’t be able to adhere to.
A backer rod permits the chinking to stick to two sides (i.e. both the logs at the top and bottom) giving it more flexibility and flexibility in two dimensions rather than 3.
In plain English The chinking can easily move along a vertical line in conjunction with the logs.
Backer-rods are typically synthetic foam that is placed into the hollow of the logs. It is generally an edging strip.
An at-home backer rod can be constructed from transparent tape, or ordinary fibreglass that is divided into 1 inch strips.
For the first step, place your backer-rod of choice in both spaces between the logs, both sides of round logs.
After gently pushing the backer rods into the rods, ensure there’s an air pocket in between the two backer rods.
If you’re using a mortar chinking device, you’ll have to put in nail chinking.
Chinking nails are Galvanised nails, angled towards the logs below every 3 inches along the cabin. This helps hold the mortar on the wood on its own while curing. The nails should be bent toward the top of the log after having you have nailed them into the log below.
Everything is prepared. It is now time to put on the Chinking.
Methods for applying chinking
There are four primary techniques for applying Chinking.
- Trowel
- Grout bag with spray nozzle
- Chinking gun (bulk loader)
- Chinking pump
None of the four approaches is superior to each other.
If you purchase chinking, it is available in 5-gallon pails, or gun chinking.
If the chinking you are making is not homemade, the chances are you’ll need trowels or grout bags.
Whatever method you prefer, place your perma chink down to the middle of your joint.
Check that your chinking lines overlap with your desired perma chink line length (typically between one and five inches).
Begin by running shorter bead lengths. It is recommended to aim for 10 linear feet in an hour. I would suggest shorter 1FT lengths of bead to cover your practice of chinking.
The majority of the time, a chinking guns can be used with a 2 inch nozzle. The gun is used together with an foam brush.
When the chinking has been put on, use the foam brush and smooth the surface of the chinking.
Quick tips from our the experience
- Do not slack in shorter 10 minute sections
- Chink lines must be one-seventh of the log’s size
- A good contact between both logs, upper and lower, is vital to maintain adhesion
- The goal is to cover ten linear feet in an hour.
- The minimum depth for chinking is 1/2 an inch
- Give plenty of time to cure
Log Cabin Chinking Repair and Maintenance
Chinking can last between 20-30 years if that it was applied in an appropriate technique and backing rods.
The only way for this to increase is when the cabin has had hot temperatures, or lots of exposure to rain.
When we refer to Chinking repairs, we usually speak of older, cement chink or paste chinking. Considering that the majority of modern synthetic cement chinking isn’t thirty years old.
The most commonly used method of maintenance called chinking is used to fill in small cracks, gaps or splits within the logs.
This defect is referred to in the field by the term “checking”.
Rule of Thumb
All checks that exceed 2 inches must be filled, regardless whether it’s a horizontal or horizontal one.
For more information on chinking recipes the how to maintain chinking, click here. can read this article.
| Cement and Sand | 1 Part Pre-Dyed Cement1 Part Fine Sand |
| Clay, Sand, and LIme | 1 Part Clay1 Part Coarse Sand1 Part Lime |
| Clay, Ash, and Salt | 4 Part Clay2 Part Wood Ashes1 Part Salt |
| Cement, Sand, and Lime | 6 Part Sand2 Part Portland Cement1 Part Lime |
In a log cabin of a standard one shouldn’t be expecting to perma chink any more than four gallons each year, which is about $200 to purchase artificial chinking.
If you’re fixing the cabin’s chinking problem, you’re doing a check, what you’re probably experiencing is a failing chinking.
If the chin has not been working. It’s often best to try with a fresh start.
If the smaller pieces fail, tape the top log and chinking area with tape, then perma chink a new top layer of chinking over.
It is based on the degree of disrepair. However, if large portions are failing, the most effective option is to get rid of all evidences of chinking that was previously present and begin again.
How to make your chinking – Log Cabin Chinking Recipes
There are many artificial chinking brands that you can buy chinking by the gallon.
Making your thinking will be a perfect self-build.
Additionally, it is less expensive, homemade chinking is also able to help improve the elasticity and stability of commercial mixes if it is done correctly.
It is important to make sure that the mix of chinking is fluid enough to allow your logs to breathe easily.
There’s a debate that Portland cement could be too hard.
Some of these recipes make use of portland cement. That’s interesting!
| Mixture per batch | Materials Used |
|---|---|
| 1 part clay 1 part coarse sand 1 part lime | Clay, Sand and Lime |
| 1 part pre-dyed cement 1 part fine sand | Cement and Sand |
| 2 part portland cement 1 part oakum 1 part grass | Cement, Oakum and Grass |
| 1 part lime 2 part portland cement 3 part masonry sand | Cement, Sand and Lime |
| 1 part portland cement 3 part coarse sand | Cement and Sand |
| 4 part clay 2 part wood ashes 1 part salt | Clay, Ash and Salt |
| 6 part sand 2 part portland cement 1 part lime | Cement, Sand and Lime |
Use identical materials throughout your batch.
Use the same ingredients and keep a consistent style for your mix.
A great guideline
If you add water for curing your cement it should have the consistency of peanut butter.v
FAQ
These substances are now called chinking. Traditional chinking is made of clay and other materials and inside layers are sealed using mortar.
The Top 7 Products For Log Homes. The Log Jam is an exceptional chinking product. Perma-Chinks are international favorites. Energy seals are specially manufactured for logs. Check Mate 2 provides powerful sealing of logs for logging and inspection purposes. Wood sandsmen can seal homes with ease. Resource lists
Mortar chinking, also known as concrete perma chink is chink created by using mixtures of clay, lime, silt, sand, and other materials. Another word for that kind of perma chink is Portland cement, a recipe with many variations.
Chinker can last for around 20 years with proper application. Chinking lasts 40 years in a year unless kept properly in an air-conditioned area. It costs about $3 to 6 per linear foot to make the log cabin.
