The escutcheon is required to hide the gap between the sprinkler head and the ceiling tile or plasterboard. These not only provide the sprinkler head but also gives a polished look.
Moreover, they are necessary for optimal sprinkler head activation. But how to take care of them or make them last? To do that, someone may be planning to put caulk on them. But he may ask himself, should I caulk around shower escutcheon?
In this article, we will discuss caulking an escutcheon.
Caulk Around The Shower Escutcheon – How To Seal
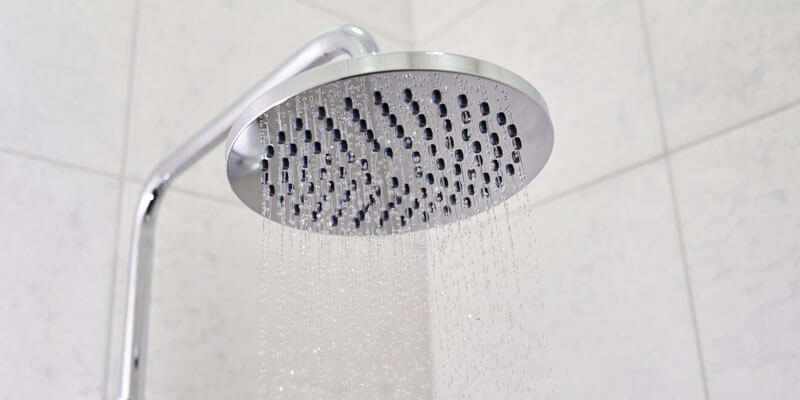
The spherical plate that fits over the shower component is an escutcheon. It provides both a decorative and a functional purpose. It hides the gaps where plumbing pipes are attached.
When it comes to caulking around shower fixtures, a shower escutcheon is not alone. A tub spout, faucet handle escutcheon, and a bathtub drain overflow plate. Who demands to caulk too? The safest caulk for a shower is 100% silicone caulk.
It can also be used to caulk shower head flange, which is prepared for plumbing purposes. This is commonly available for sealing shower escutcheon gaps. Silicone caulk has excellent sticking capabilities, which prevents cracks and holds the trim.
To do the process a few elements are needed, such as:
- Clean rags
- Putty knife
- Utility knife
- Materials
- Bathroom cleaner
- 100 percent silicone caulk
Caulking Application Procedure
Apply the caulk around the shower escutcheon; a few things need to keep in mind.
1. Clean the Floor
Clean the floor slowly, where someone is going to apply the caulk. Surfaces should be cleaned. Rinse and dry the place with a clean rag. Caulk sticks better on a clean surface, so make sure the walls and frame are fully clean and dry before applying the caulk.
If you are replacing old caulking, use your putty knife to remove all of the old caulk and carefully clean the surface.
2. Make the Caulk Tube
The key to a smooth application is to cut the appropriate size opening in the caulk tube’s tip. A smooth cut always provides a caulk bead, so try to cut the glue tip in a narrow way. In the case of trimming, a 1/4- to 3/8-inch bead is perfect.
Remove the cap and cut the tip of the caulk at a 45-degree angle using a sharp utility knife. Though, some caulk tubes come up with markings on the tip that show where to cut.
3. Caulk is Used
Set the sprayer tip at a 45-degree angle against the shower floor. Put a narrow bead of caulk all the way around the shower trim.
Water can leak through the slightest gap, so it is essential to seal the entire gap. A shower escutcheon installation demands this type of caulking process.
4. Caulk Bead Should be Smoothed
Immediately after applying, smooth off each bead of caulk with a wet finger or sponge. Use warm water to do the process.
This idea gives a thin, tidy bead that covers the trim completely. It is important to do this. Because silicone caulk takes a long time to dry fully, it becomes stable after drying.
It’s up to you how much caulk you want to remove. Some people prefer to use the bulk of the caulk with a thick look, but small, thin beads look better. As long as there are no gaps, a thin caulk line is equally as efficient as a thick one. The shower escutcheon seal also demands a thin line of caulk.
Additional Tips for Usage
Wait for the caulk to harden, as instructed by the manufacturer. Before it can resist extended exposure to water, silicone caulk usually needs to dry for at least 24 hours.
When you’re finished storing it, easily replace the cap on the squeeze-tube sealant used in this project. After applying caulk, make sure the caulk tube’s tip is properly sealed before storing.
Plastic wrap can be wrapped around the tip and secured with a rubber band, or a large nail or golf tee can be inserted into the tip to form a connector. Keep the caulk straight at all times.
If you stick the rear side with silicone, you will never be able to remove it. First, install the plate, then caulk. And certainly not at the bottom. Some plates even have a hole on the bottom to allow water to drain.
FAQ
Why shower escutcheon plat loose?
There was also a chance that the pipe connecting the shower diverter and another possible cause could be joint pipe leakage.
What exactly is an escutcheon gasket?
Do you apply caulk around the shower valve?
If you wish to avoid any leak, the answer is a clear yes. To gather better knowledge, do some research about how to seal around shower valve.
Is it necessary to caulk around an escutcheon?
Wrapping Up!
Do not confuse about should you caulk around shower escutcheon or not. Just do it and keep your washroom escutcheon mold-free and long-lasting. The ideal caulk for a shower is 100% silicone caulk.
Want to Learn More:
- How To Prevent Mold In Shower Caulk: 4 Ways Of Prevention
- 4 Steps: How To Paint Over Non-Paintable Silicone?
- Should You Caulk Cabinets Before Painting?
- 3 Causes Why Does Clear Caulk Turn White?
- How To Remove Mold From Under Silicone Caulk (5 Steps Process)
Hello! this is John Cox. If I’m not wrong, you love Home. Right? And you already met one of them who’ve been in this field since 2005 and still go on. According to my interest, I’ve started this blog to share my thoughts about Home sectors, and you’ll love it.
