When we are talking about the kitchen sink, water percolation becomes an integral part of it. Water finds its way down if white or clear caulk around the sink is old or weak. Hence the wood right underneath the sink might get affected – causing it to deteriorate soon and falls apart. So, you need to know how to replace silicone around sink.
This will be a pretty straightforward guide for replacing silicone. Whether you have tried anything like this before or this is the first time you’re doing this, there won’t be any difficulty at all.
Silicone Around Kitchen Sink
Before starting off, let’s talk about some basics.
In kitchens, we use metal or stainless sinks in most cases. Hence, you have to use silicone-based caulk for that.
On the other hand, we prefer using a porcelain-made sink for bathroom space. For this type of sink, latex-based caulk works better. So, you must select the right kind of caulk. Fast forward, I will describe how to remove silicone from the sink.
Replacing the Old Silicone
First, you will have to remove the old caulk. After that, consider applying a new sealant. You need some materials and pieces of equipment first. When it comes to sealant color, most of us choose white or clear caulk around the sink.
But, there are some other colors available in store. You can use them as per your preference.
This job is super easy. You can do this at home once you got all the things mentioned below –
Materials
- Mineral turpentine
- Acetone
- Tape
- Razor Blade
- Denatured alcohol
- Painters’ tool
- Towel or wash-cloth
Tools
- Caulk gun
- Sealant smoother tool or sealant remover tool
- Rounded spatula
Cleaning the Surface
Use mineral turpentine to clean the surface around the sink and countertop. It will help create a strong bond while caulking. Wait until the turpentine dries and get ready for the next step, where we will remove the old caulk.
Softening the Old Caulk
We are using silicone-based caulk here. Bring some acetone or denatured alcohol. Soak the towel or washcloth in it. Then apply this to the worn caulk. This thing makes the caulk soft and easily removable.
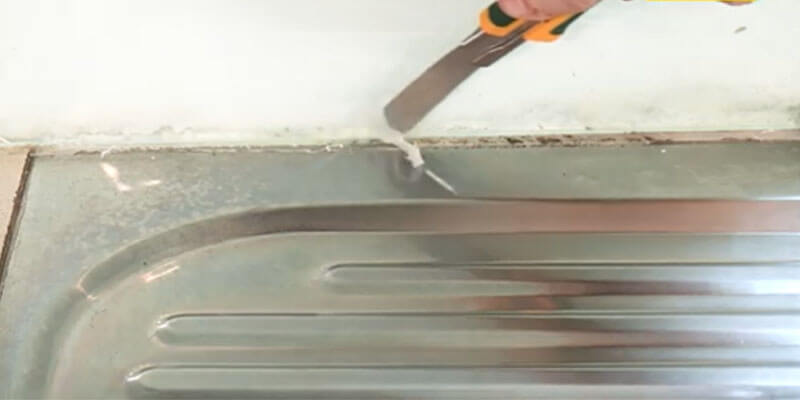
Scrape it Off
Wipe out the existing sealant with a sealant remover. Use a sharp scraper (or a straight razor) to do your job smoothly. This tool must have a pointed tip to cut it through the sealant and scrape the adhesive away.
Removal of the old sealant may take more time than usual. It’s worth investing time because the smoothly finished surface will create a strong bond with the adhesive.
Struggling with Moldy Sealant
As you have been using this sink for a long time, the chances are high that your sealant gets moldy. In this case, use a suitable mold remover to get your job done.
Apply the remover properly, and wait for a while until the mold is eliminated. Rinse off the remover afterward.
Protective Cover
Before you apply new silicone caulk to your sink, bring tape and place it around all the edges of the sink. Make a channel along the length of the tape with the help of a razor. We are doing this for two reasons.
- Once we put sealant on the channel, it may spill over. The residue part will rest on the tape so that the countertop remains clean.
- People hate to see the caulk sealant around the sink or countertop. This tape will allow a bare minimum space to apply the adhesive. That way, it looks aesthetic.
Time to Seal
Try to find the best silicon for the kitchen sink from the shop. Selleys no mold silicone sealant and DAP Kwik seal are more common. You can use it as per your own choice, though. Remember, good glue can solve your problem of the kitchen sink leaking around the edges.
Get the sealant, pop the cap off of the sealant tube, and cut the end of it with a sharp knife. There is a seal at the base of the spout of the tube.
Notice that the caulk gun comes with a tiny pin. Pull the pin out, rotate it out, and put it right in there to puncture that seal. Finally, put it in the gun.
Load the Caulking Gun
The tube is set and ready for loading. In the caulking gun, there’s a trigger. Pull the trigger, and the sealant will come out immediately. Make sure you place silicone at a 45-degree angle. Try to maintain a constant flow to make an even layer. This layer will be placed step by step. It will prevent catching moisture and forming mildew.
Spread the Strip
Use a rounded spatula or painter’s tool to make the strip smooth. You can even do this with your finger. Before that, make sure your hand is wet to avoid contact with the sealant. Spread the caulk carefully around your sink. Peel the tape out that you stuck earlier to the sink.
Take a Break
Upon applying the sealant, you might want to wait at least 24 hours to make it dry. You can use white spirit to remove extra silicone.
In case you want to learn how to seal a kitchen sink to granite, the process is similar to the procedure mentioned above. Long story short, the course of action for replacing silicone is the same as the one discussed here, regardless of what material your countertop is made of.
FAQ
What is the advantage of using denatured alcohol?
How will I clean up the existing caulk?
Why is it so important to choose a suitable sealant?
Wrapping Up!
Cheers! You have learned how to replace silicone around sink!
Your old, moldy, and grody sealant caulk around the sink will now get a fresh look just after installing a new caulk. Silicone sealant can be called a blessing thanks to its adhesive property. When it comes to waterproofing, caulking is the only way to get you out of this problem.
Want to Learn More:
- 4 Steps: How To Paint Over Non-Paintable Silicone?
- Using Grout Instead of Caulk: Possible or Not?
- How To Remove Mold From Under Silicone Caulk (5 Steps Process)
- Should You Caulk Cabinets Before Painting?
Hello! this is John Cox. If I’m not wrong, you love Home. Right? And you already met one of them who’ve been in this field since 2005 and still go on. According to my interest, I’ve started this blog to share my thoughts about Home sectors, and you’ll love it.
