Tiling creates a beautiful, durable, and makes it easy to clean at the same time. It is being used in almost every house nowadays because of its vast advantages. However, the main challenge homeowners face here is how to make exposed tile edges look finished. Only bullnose tiles have finished edges. Except for using this tile, you must finish the outside edge of all types of tiles.
You will get many tile-edging options to do it like edging with caulk, metal edging, bullnose edging, rail moldings, etc. This article will basically discuss how to finish tile edges with caulk. If you follow this process, you will easily be able to do it yourself. So, with further ado, let’s get into the discussion.
Tools and Materials Required for the Process
Before you think about beginning, you have to make sure that you have gathered all the required tools and materials for the caulking process. The tools you will need in this process are as follows:
- Retractable Razor Blade Scraper,
- Smooth Action Dripless Caulking Gun,
- Putty Knife, or 5 in 1 tool,
- Shop vacuum.
Now, let’s check out the materials needed for the caulking process:
- Caulk,
- Blue painter’s tape,
- Rubbing alcohol,
- Cotton rags.
Step By Step Process to Finish Tile Edge with Caulk
Caulking is an easy process, but if you don’t know the right way to do it, it will be very tough for you to complete it perfectly. That is why we are giving you a step-by-step process of caulking. These steps are as follows:
Step-1: Select the Right Caulk
There are varieties of caulks to choose from. You have to choose one very carefully that meets your needs. Now, let’s check out all those varieties of caulks and explore which one is perfect for what needs:
- Acrylic Latex Caulk: Acryliclatex caulk is a standard multi-purpose caulk that is generally used for dry areas. This caulk is paintable and easy to clean up. Besides finishing the edges, it also gives anti-moisture protection. It is appropriate for almost all types of baseboards and wood moldings.
- Silicone Caulk: This one is the premium type of caulk that is used in wet areas like sink areas, toilets, faucets, joints in wet areas, etc. It is also used as a general-purpose sealant by which you can fix all types of holes in the wall and make it waterproof or fill all types of gaps between two materials. Silicone caulk is very expensive but worth it because it is flexible and lasts for a long.
- Latex Caulk with Silicone: It is a basic latex caulk in which silicon caulk is added to make it more water-resistant. A big downside of silicone caulk is that it is not paintable. However, latex caulk with silicone is paintable and excellent for both indoor and outdoor use. Besides, you can clean it very easily with soap.
- Butyl Rubber Caulk: Butyl rubber caulk is mostly appropriate for outdoor use, like for sealing gutters and repairing roofs and some relevant places. It is sticky and messy caulk but excellent for metal and masonry also. You can fill large joints perfectly by using this caulk.
- Masonry Repair Caulk: This caulk is primarily made to repair and seal cracks and expansion joints of the driveways and all concrete surfaces. It is a highly flexible caulk and slightly complex to clean.
- Refractory Caulk: Refractory caulk is also called fireplace caulk which is basically a high-temperature sealant. This caulk is suitable for filling cracks in bricks, concrete, and other masonry materials like masonry fireplaces, chimneys, etc.
Well, these are mainly the most common types of caulks. After reading till here, you should know which one is perfect and appropriate for your place. So, among these, choose the right caulk according to your need.
Step-2: Remove the Old Caulk and Clean the Tile Edges and Surface
Now, it is time to prepare the surface for applying the caulk. Preparation is mandatory for an effective caulking process. So, take the retractable razor blade scraper and remove the old caulk if needed. You may need a caulk remover to perfectly clean the caulk joint in corners like where a wall meets a sink, tub, etc. Depending on the age and location of caulking, a putty knife, or 5 in 1 tool, will be sufficient to clean.
Use the shop vacuum to clean all the debris from the surface and tile edges that are created at the time of tile installation or remove the old caulk. After that, clean the surface and edges with rubbing alcohol. Finally, make sure that the surface is clean, dry, and smooth.
Step-3: Tape the Surface
Taping the surface before caulk application is important to make the perfect finishing outside edge of the tile. So, apply the blue painter’s tape at the point where you want to stop the edge of the caulk bead. The tape should be applied straight and in one section, with no short pieces.
Generally, the width of the caulk should be ¼ inch. If it is an uneven surface, it should be up to 3/8 inch. The main objective of this taping is to seal the edge of the caulk so that the caulk cannot seep beneath it.
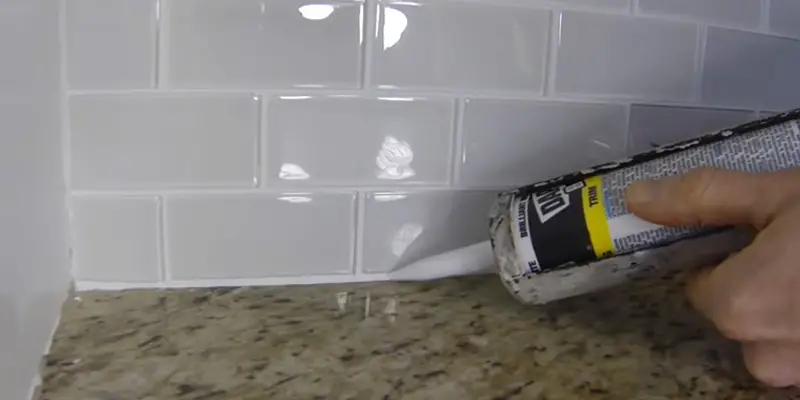
Step-4: Apply the Caulk
After removing the old caulk and cleaning and taping the surface, it is now time to apply the caulk. Take your chosen caulk tube and open it by cutting its nozzle at a 45-degree angle using a knife. Then insert a clean, and long nail or wire into the nozzle to lick the inner seal of the caulk tube. Insert it multiple times so that seal is perfectly punctured and you can get a smooth flow of the caulk.
Now apply the caulk to the joint at a 45-degree angle between horizontal and vertical. Make sure you squeeze so hard that enough caulk comes out. Apply it like this in all the places needed and fill the joints.
Step-5: Smoothen the Caulk Line
Dip your finger in the rubbing alcohol or water and make it wet. For silicon caulk, use rubbing alcohol and for latex caulk, use water. With light pressure, smoothen the caulk line with those wet fingers and ensure that the joints are perfectly filled with caulk. The smoother you can make the caulk in the joint, the better finishing you get in the edges.
Step-6: Remove the Tape
Now, in the last step, it is time to remove the tape very carefully and slowly. Make sure that the tape doesn’t touch the joint area. In most cases, the tape will be wet by caulk. That is why you should handle the tape very carefully so that any wet caulk can’t drop into the surrounding areas. By completing this step, your caulking process will be finished.
FAQ
There are some frequently asked questions regarding this topic. The most significant FAQs are as follows:
How do you finish tile edges without trimming?
Should I caulk the corners of my tile shower?
How do you cover rough edges of tile?
Does the backsplash need trim?
Conclusion
When you are thinking about finishing the tile edges, caulking is the best option. It will give your tiles a waterproof seal. To get the best result and long-lasting finish, choose the ideal type of caulk needed for your place.
In this writing, we have given you a complete guide on how to finish tile edges with caulk. Just follow it to make your project perfectly done.
Want to Learn More:
- How To Caulk Door Trim And Jambs – Particular Steps Explained
- How To Remove Wet Silicone Caulk – 5 Easiest Steps To Doing It
- How To Remove Mold From Under Silicone Caulk (5 Steps Process)
- How to Get Rid of Mold in Shower Caulk – Multiple Solution
Hello! this is John Cox. If I’m not wrong, you love Home. Right? And you already met one of them who’ve been in this field since 2005 and still go on. According to my interest, I’ve started this blog to share my thoughts about Home sectors, and you’ll love it.
