What can you do about a zigzag door that looks so unprofessional? The solution is caulking. The door trim, jamb, and frame are only a few of the components that make up a door. Even if the caulking techniques for all of them are largely the same, it isn’t necessary for everyone to be familiar with them.
A door’s caulking reduces air leakage and gaps. Caulking around the door is mostly a DIY fix and people re-caulk their doors when the caulk becomes old or damaged.
If you are one of those who know the importance of door caulking but do not know the process, then this article is for you. Here we will discuss how to caulk jambs and door trim.
What Are Door Trim and Jamb?
Before knowing the steps, first of all, look at what they are.
Trim
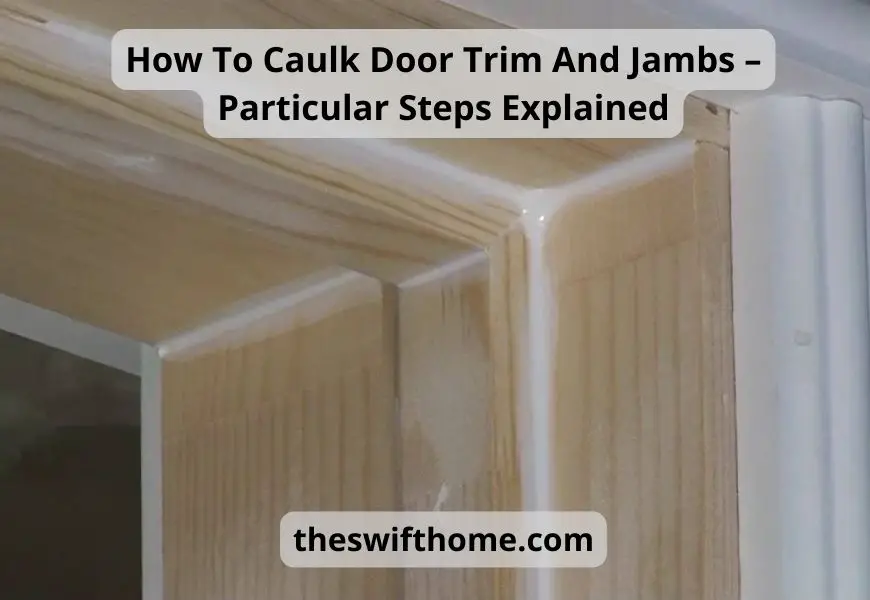
Typically, the door trim is designed to cover the gap between the door and the wall. But it depends on the style, material, and color. Moreover, a trim can give a room a modest, vintage vibe or an expensive, professional atmosphere.
Jamb

Moreover, a door jamb is a solid piece of a door frame. Two side jambs and a head jamb combine to form the door frame. The vertical parts are the side jambs, and the horizontal part is the head jamb.
Materials and Tools:
- Silicone Caulk
- Latex Caulk
- Caulking gun
- Wet cloths
- Sponge
How to Caulk a Door Trim – Follow these Steps
So, how to caulk trim the corner of a door? Here are the steps…
Step 1: Clean the trim surface with a wet cloth because a door trim can be attracted to dirt. And a caulking process never gives a good outcome with a dirty surface.
Step 2: Choose a well-branded silicone caulk. Dap Alex caulk is the best in this process. Next, pick a good caulking gun.
Step 3: Cut the caulk nozzle. A razor blade works well for cutting the caulk tube’s nozzle. To make a larger bead, cut the tube at a 45-degree angle around 1/8″ to 1/4″ away from the tip.
Next, break the tube’s internal seal by putting a wire or nail into the nozzle hole. Finally, ensure that the piston of the caulk gun is positioned at the bottom of the tube by adjusting the rod.
Step 4: Apply the caulk from top to bottom of the door trim using a caulking gun. Do not just use too much caulk, just put the needed amount.
Step 5: Smoothen the caulk by using a dry finger whenever the caulk becomes dry. And lastly, let the trim set for the whole night.
How to Caulk a Door Jambs – Follow these Steps
Do you know how to caulk door jambs? If not, we are here to teach you the basics of caulking. Caulking around door jambs is related to sealing the gap around the door trim and frame.
Step 1: Choose a well-reputed latex and caulk gun because a low-branded caulk comes up lumpy and hard. Cut the tip of the caulk at a 45-degree angle. Latex caulk is best for door jambs.
Step 2: Do not caulk unpolished wood, given enough time to dry after priming and painting the walls of the door. Your door jamb can be caulked once it has been varnished.
The wood absorbs the moisture from the caulking, and the caulking dries too quickly when it is applied to raw wood.
Caulk should be used to fill in any gaps between the trim and the wall and where the multiple pieces of wood have joined.
Step 3: Cracks and flaws in previously painted wood are more obvious in this process. To smooth the caulk, run a small bead along the length of the gap while holding the caulking gun at a 45-degree angle. A damp sponge and a wet finger can be used to fill a gap.
Step 4: Leave the door overnight and let it dry.
FAQ
What kind of caulk for door trim?
Final Thoughts!
The door trim and jamb are two of the most important parts of the door. Caulking without a door looks miserable, so it is important to know how to caulk door trim and jambs. Here we have explained the proper steps for both of them. Read and all and know the difference between the procedure.
Want to Learn More:
- How to Get Rid of Mold in Shower Caulk – Multiple Solution
- Is Landlord Responsible For Caulking (Assumption Or Fact)
- Why Does My Caulk Keep Cracking (7 Ultimate Reasons)
- How To Remove Wet Silicone Caulk – 5 Easiest Steps To Doing It
Hello! this is John Cox. If I’m not wrong, you love Home. Right? And you already met one of them who’ve been in this field since 2005 and still go on. According to my interest, I’ve started this blog to share my thoughts about Home sectors, and you’ll love it.
