Proper application of caulk requires practice. Therefore, if you are fairly new to the process, applying the wrong bead of caulk is normal. In some cases, if you use acrylic caulk, you may be able to repair mismatched lines with new ones and hide the old ones.
On the other hand, if you use silicone caulk to cover an awkward area and come up the wrong way, then you will need to remove your extra attempt and begin over.
If a caulking bead goes wrong, removing it from the surface is the only solution. But how to do that? First, you can do that without any hassle by following a few simple steps.
You cannot expect a one-line answer from them as they are. So, here we will explain why caulk fails and how to fix an odd caulking job.
The 3 Causes of Caulk Failure
The primary purpose of caulk is to seal cracks and gaps while maintaining a professional appearance. Nevertheless, this does not always happen due to negligence, and we refer to the result of such work as a poor job. Here, we will discuss the three most common causes of caulking failure.
1. Improper Application
Applying caulk is a basic skill that every homeowner needs to know and be able to do. On the other hand, caulking has several problems that you need to be aware of if you want to make a surface that looks good. When there is likely to be movement on the construction site, this flexible material must be used to connect two or more building parts that are close to each other.
Caulk seals joints that are not completely sealed to stop air or water from getting in or out. It is the recommended way to fill cracks or joints that are 1/2 inch wide. However, sometimes users try to cover a larger surface with caulk, and as a result, it becomes an improper application of caulk.
2. Choosing the Wrong Caulk
There are four main types of caulks: latex caulk, silicone sealant, polyurethane, and butyl-rubber caulk. Therefore, they all have different mechanisms and usage. If you apply them randomly, it can be a cause of caulk failure.
The price of a single tube of caulk can range anywhere from $1.50 to $14. Be sure to examine the temperature range if you apply the caulk in cool weather. Some sealants may be applied at any temperature, while others need a temperature of at least 40 degrees. It would help if you chose caulk according to the surface and weather.
If you apply the wrong caulk in a certain place, it will not fit. For example, some sealants are not best for outside usage. In addition, the wrong type of caulking is expected to fail early if it is exposed to sunlight, heat, and rain. And removing that caulk is the only option.
3. Improper Maintenance
Mold and mildew are other things that can cause caulk to fail. The caulk will crack if you don’t do proper maintenance or skip the re-caulking process. When caulk breaks, fixing is the answer. Clean the area where the caulk will go with vinegar and bleach to make it last longer.
4 Steps How to Fix a Bad Caulk Job

Step 1: Take Preparation
To begin with, you will require a solvent to assist in softening the caulk. The removal process will be simplified as a result. Caulking can be loosened to the point where it can be easily removed with the help of several different liquids, including alcohol, baking soda, vinegar, and WD-40.
In addition, you will need a putty knife, a razor blade, or some other kind of sharp blade. Next, you will need mineral spirits, paper towels, gloves, a sponge, water, a caulking gun, and the preferred caulk you prefer to use. Silicone caulk comes highly recommended if you intend to use it in your bathroom.
Step 2: Remove the Faulty Caulk
It would help if you began by removing the old caulking that failed previously. To fix this, wash the caulk with your preferred liquid. Using WD-40 is the most simple, direct, and direct option in such a case. In addition, using vinegar, baking soda, or rubbing alcohol can help. After applying this material, wait 30 to 60 minutes.
When the caulk has become relatively soft, remove it with a razor blade, a putty knife, or any other type of sharp knife. Ensure that all of the caulking is removed without leaving any loose pieces.
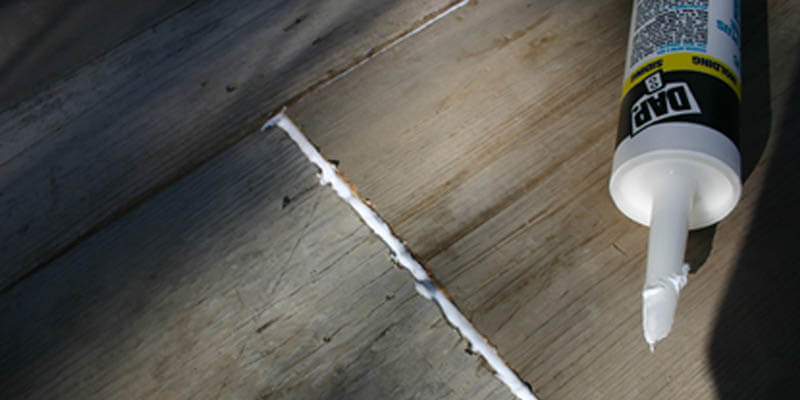
Step 3: Apply the New Caulk
Now comes the most difficult section, so fasten your seat belts. This is because it was apparent that you applied caulk improperly the last time. Do not repeat the same errors this time. The key to success in this situation is ensuring that the caulking gun’s tip has been appropriately trimmed.
With a good pair of scissors, cut the tube of caulk. The opening should be no larger than 1/8 inch in diameter and 45 degrees in angle. Place the caulk tube at the desired starting point, then slowly pull back on the trigger and move the gun along the path until you get the complete required bead.
Step 4: Improve the Caulk’s Texture
If you want to give your caulk a smooth appearance, run your finger along it while pressing it down and smoothing it out.
When an excessive amount of caulk is removed by your finger, wipe it off with a wet piece of paper towel. When doing so, ensure that the tip of your finger is slightly moistened so it can freely move out.
Suppose you made a mess during the previous step. Now is the time to clean it with a sponge and some water.
Suggested Tips and Frequent Errors
If you follow these guidelines, it will be much easier for you to fix a botched caulking job.
- Ensure that you acquire and use a caulking gun of high quality. The smoothness of the caulking gun’s action is directly proportional to the ease with which you can apply this bead. Don’t sacrifice quality.
- It is essential to remember to pull the caulking gun towards yourself before laying down a bead of caulk. It is much more challenging to caulk while pushing the gun away from you than pulling it closer.
- Even though your finger should be damp when you use it to smooth the line, you must be careful not to fill up the freshly applied caulking. It will not properly cure if it is exposed to an excessive amount of water.
So, making mistakes while the caulk is very common, just fix them with time.
Hello! this is John Cox. If I’m not wrong, you love Home. Right? And you already met one of them who’ve been in this field since 2005 and still go on. According to my interest, I’ve started this blog to share my thoughts about Home sectors, and you’ll love it.